
With everything going wireless, it's a logical choice to have a wireless printer. They can range from a couple hundred dollars to a couple thousand, depending on what kind of printer you choose.
But you don't want to invest in a new printer when the one you have works perfectly. Well I found a solution! And it is very inexpensive!
The key to this setup was the router. Fonera makes a very small wireless B/G router which makes it easy to install anywhere. You can find them on ebay for less then $20
The original firmware would not do for my project so I installed DD-WRT. and I would like to thank all those who answered my questions and helped me at www.dd-wrt.com
So now I will show you the construction on my wireless network printer adapter.
Step 1
Gather all the parts together
You will need a printer, a network adapter for the printer, a wireless router, wire, LEDs, solder, and plenty of time.
Printer: I think any printer will work, as long as there is room inside it to fit the router. I was given the LaserJet 5 and found out that it had network capabilities. I searched Ebay and found a network card, untested, for $7. A most definite BARGAIN! For all those with printers that attach with usb, they make usb-to-network adapters, I believe they will work too.
Router: I chose the FONERA wireless router based on three things: 1) it's size, 2) customization with DD-WRT, and 3) the Price. I was able to pick up a couple of these for free.
Router Software: DD-WRT is software that is installed inside the router and opens up the potential that many routers contain.
NOTE: As far as the exact setup for your router and printer, you will find the most help in the forums. At the end of this post, I will put screen shots of my current setup. Hopefully that will help.
Misc Parts: I used many different parts from various computer/electrical components. All of the parts have been laying throughout the house collecting dust. I don't have a parts list, so just follow the basic layout and you can find out what works best for you.
Step 2
Find space for your router
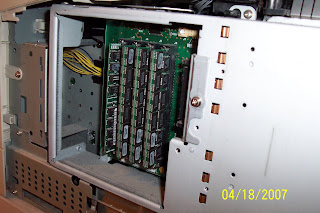
There are two was to locate some extra room inside your printer. One way is to just take it apart. You're going to be taking it apart anyway so why not start there. Unless, of coarse, you still need a functional printer at this time. And the second way to find some open space is to use Google. There are many sites that carry "service manuals" for your printer. A "service manual" is the manual that the repair technicians use to fix the printers. it gives detailed instructions that go beyond printing-a-test-page. For example: we will be covering how to power the router later and the "service manual" will give information on the power supply and the wires inside the printer.
I found a perfect spot to mount my router. It is located towards the front of the printer, and has plenty of space.
Step 3:
Make your mounting bracket
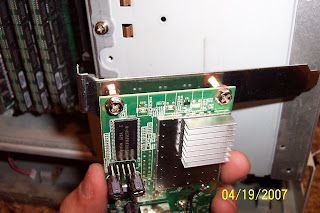
The simplest bracket mounting system I found was to use one of those computer expansion port covers. It's the piece of metal that most people remove from their computer when they add a video card, network card, sound card or other pci/agp card into their computer. Just drill 2 holes and add some spacers (I used motherboard stand-offs) The result has a nice clean look.
Cut a little slot in the metal and slide your bracket in. Then mark the cutout area.
Next I used a blank CD to make another mounting for the quick connect and the antenna connection. (blurry, sorry)To bend the plastic, just heat it up with a hot air gun or blow torch. Then drill the hole for the antenna connector.
Step 4:
Wire the adapter
This is the part where you can use whatever you have.
I pulled a jumper block off an old parallel/serial pc card and used that as a quick connection block. Using my dremel, I carefully drilled a series of holes in the CD bracket and soldered the jumper block to it.
I need 2 connection for each LED: Power, LAN (cat5), and WLAN (wireless). and 4 connection for the reset switch. I intended also to have the antenna connected also but decided on a different method for that.
The goal here is to have access to the lights and reset switch when the router is installed in the printer.
Wiring for the LEDsWiring for the reset switch
All wired
Step 5:
Find some power
The Fonera runs off 5v and according the the Laserjet 5 service manual it also produces a 5v source. Now I'm not an electrician, but using my multimeter, I was comfortable using the power from the printer.
Blue wire: Ground, Brown wire: 5v, Red wire: 24v.
Remove the needed wires from the connector so you can solder to them
(no picture: The wire I used was pulled off the computers internal speaker. One end soldered directly to the power supply wires and the other end has the the connector for the block pictured below)
Another custom jumper block soldered to the router.
Step 6:
Some Assembly required
At this point you should have your router mountable and wired up. Now comes the fun part.
Adding lights. Standard LEDs will work fine.
Here's a little tip: To get the "Glowing" effect, just use some fine sand paper and lightly sand the LEDs
finding a location to mount the lights and switch, and still trying to make it look nice, might be a challenge. So find a spot that looks good and can be accessed easily.
Once you find a spot, dill the holes and mount them
a little hot glue to hold it in
a little more wiring
cleaned up
a little pre-Assembly testing
Step 7:
Final Assembly and testing
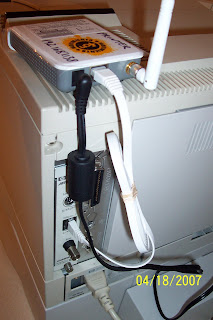
In this picture you can see the router mounted in place. Also you can see the antenna installed and the connector that leads to the lights and the reset switch.
one note about the antenna:
I wanted to mount the antenna on the outside of the printer to get a better signal (i get a decent signal now) but I did not have a long enough cable. I had 2 failed attempts at making my own cable, not only that, but i got worse signal then with no antenna connected at all. So if you have a long antenna cable then it is recommended to mount it on the outside of the printer.
Before:
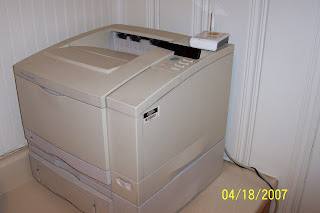
After:
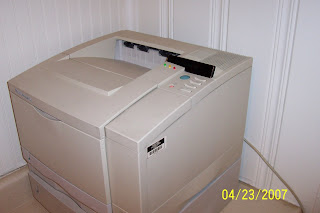
Before:
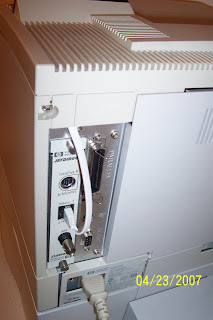
After:
Final Thoughts:
After you have completed this project, you will have a less clustered mess of wires. Also, using DD-WRT, you have the option of making your printer a Hot-Spot for your wireless network.
DD-WRT on the Fonera is still in its infancy, so there are a lot of options that have yet to be perfected.
My Wireless Setup:
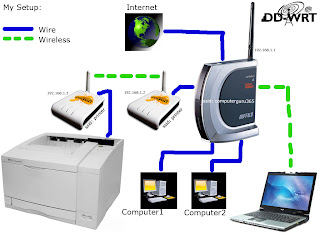
The following screen shots are of my current dd-wrt settings.
192.168.1.2 (fonera plugged into the Buffalo)
administration-management
administration-keep.alive
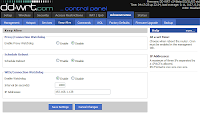
security-firewall
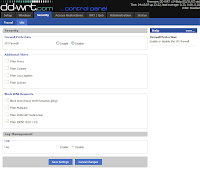
setup-advanced.routing
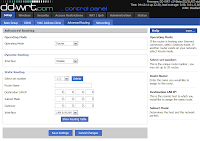
setup-basic.setup
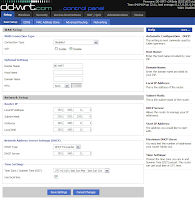
status-lan
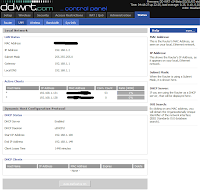
status-wireless
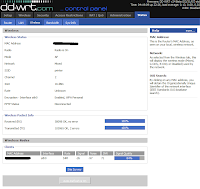
sys-info
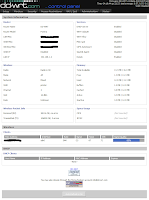
wireless-basic.settings
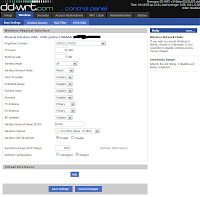
wireless-wireless.security

---------------------------------------------------------
192.168.1.3 (fonera plugged into the printer)
administration-management
security-firewall

setup-advanced.routing

setup-basic.setup

status-lan

status-wireless

sys-info

wireless-basic.settings

wireless-wireless.security

If you have any questions or need something explained in more detail, just let me know
As Always, Have Fun


41 comments:
Amazing job - some real quality work. It's been submitted into queue @ tweako
any idea about how to configure the wrt54g from linksys ???
Why do you need the third AP (the fonera plugged int othe buffalo). Would it not be sufficient to have only one fonera plugged into the printer which would communicate directly with buffalo?
yeah, liam brings up a good question
well, that is the only way i could get a wireless bridge to work. i am using 3.31.07 firmware on the foneras. i have not tested newer version because it's working fine now. i was not able to get the fonera connected directly to the buffalo, but when using 2 foneras it connected right away.
your don't need "bridge mode" per se, "client mode" works fine.
Of course, this creates a NAT behind that client mode router, but since all you have is one printer behind it, just turn on DMZ and it's pretty much the same thing.
Why did you connect 4 wired to the reset button there are only 2 connections, 2 pins per side. so you only have to tap into one pin per side of the switch.
i wasn't sure what the exact wiring was supposed to be, so to be on the safe side, i just wired all 4 posts. the worst it can be is redundant, rather then missing a critical connection.
- client mode will work if only the printer is connected, but i will be using mine as a hotspot, so i needed client-bridge.
I assume the second Fonera is there to keep stock-default. So he can use the one inside the printer as a 'play Fonera'
This kind of setup is what i'm doing with my 2 Foneras, keeping 1 stock, and 1 'a bit less stock'
nice work, but you should have soldered the cat5 cable from the fonera directly to where the cat5 jack is soldered inside the printer. in fact you should have removed the jack altogether, put in a small piece of whatever to fill in the space and just soldered the fonera directly to the printers circuit board. would have been nicer than that cable loop sticking out in the back.
wouldnt you be able to connect the fonera wirelessly to your main router in ad-hoc mode? I'm working on pretty much the same setup right now and am working with one fonera and a dd-wrt linksys wrt54gs. Hopefully ill get it to work. if not i think i have an extra foneral laying around somewhere.
T'as réinventé la roue là!
Tu parles d'un exploit!
Je pensais que tu aurai repiqué l'i2c pour l'envoyer ver un module wifi que l'on trouve chez tout bon revendeur de composants électroniques!
Moi, je note...1/10, pour la peine...
Thank for sharing
Free Resetter Printer And Service Manual
Nice work!
... but if your printer breaks then you will have to redo a lot of work. Just duct taping the whole thing to the back would have effectively hidden it away. IMHO.
Keep up your good work mate
*love* the way you use a cd as an easy way to make a 'molded' bracket :)
I will certainly remember and use that one for a future project...
Thanx!
I want to buy these: Dell
Can i access this printer via web ?
Wow!!Amazing work!!Keep it up!!I like your blog!!You have some really good stuff!!
awesome stuff dude :) im looking to do something like that, with much much less effort ( i don't have the time to strip my printer apart, make brackets etc.) im looking for a simple plug in a wireless usb reciever/transmitter kinda option, any suggestions? thanks in advance!
awesome stuff dude :) im looking to do something like that, with much much less effort ( i don't have the time to strip my printer apart, make brackets etc.) im looking for a simple plug in a wireless usb reciever/transmitter kinda option, any suggestions? thanks in advance!
Very nice work around. I'd not thought of internal placement of the wifi router.
Keep up the fine work.
This is the good blog with good images and good details. Please keep on posting the more stuff. I will like to hear more from you.
Great post!
Interesting and important information. It is really beneficial for us. Thanks
Hello! I just would like to give a huge thumbs up for the great info you have here on this post. I will be coming back to your blog for more soon.
Thank you to tell us so much useful information. So nice sharing. I’m glad to read it.
Interesting and important information. It is really beneficial for us. Thanks Network Printer Setup
These are great. Can these be used for printing plastic business cards?
Amazing printer. And Sweet Fairy i don't know that it should be used for plastic business cards or not.
Appreicate your thoughts, Im not always in agreement, but you do cause a peron to think keep blogging!carpet cleaning adelaide
Making your printer wireless is very easy but if your are finding is difficult, you should look for IT expert. IT expert can help you lot in making your printer wireless.
IT support central coast
http://itlocal.com.au/
Nice post with awesome points! Can’t wait for the next one.
Acer - 17.3" Laptop - 12GB Memory - 1TB Hard Drive - Black
Acer - TravelMate B Series 11.6" Laptop - 4GB Memory - 500GB Hard Drive - Black
Wonderful and Improtant blog for Printer Users
here we provide the wireless printer setup service free of cost
call us our Toll-Free no is +1-855-517-2433 and for more information visit our site Printer support
HP LaserJet Printer Tech Support & HP Wireless LaserJet Printer tech support phone number for troubleshoot HP problems.Our certified technicians & Experts are available 24/7 to deal with your HP problems.We are successful in repairing different types of serious faults of HP LaserJet printers . Hp laserjet printer tech support number 1-800-608-2315 better support customer service .
Use our Canon printer support to know more about app functions and issues. There are experience experts at Canon Printer Support who are known for there services.Feel free to discuss all Canon printer issue at Canon printer Support where our Technical Support teams are available for 24*7 hrs to deliver one of the best solutions. just call our toll-free number: +1 8544-00-5545
https://printeroffline-fix.com/canon-printer-support/
printer is showing offline
microsoft word not responding
malwarebytes will not open windows 10
malwarebytes not working with win 10
malwarebytes not working windows 10
malwarebytes not opening windows 10
malwarebytes not working
malwarebytes not opening
malwarebytes program will not open in windows 10
Post a Comment