BLACKBERRY SCROLL WHEEL CLICKER BUTTON FIX
Click here for the 'Back' button fix
If you ever had to replace your Blackberry, chances are that the buttons on the side didn't work anymore. That scroll wheel wouldn't click, and it was such an inconvenience to hit the enter key all the time. If you were lucky, you could push it down just right and it would work. But after a while nothing would work anymore and you were stuck with a hundred dollar repair charge or a new phone.
Well now you can keep your old trusty phone and repair that bum button yourself.
This how-to should work for any phone that has buttons that don't 'click' anymore, because I am going to show you how to fix the button, no matter what phone you have.
DISCLAIMER: Taking apart your phone will void your warranty. This is a how-to guide. I cannot be held responsible if you damage your phone. USE AT YOUR OWN RISK!
The hard part is trying to figure out how to disassemble your phone. Each phone is different so have GOOGLE be your guide when you take it apart.
Once you have opened it up all the way to the circuit board then you are ready to go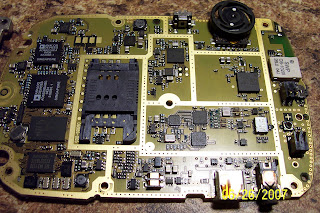
In the upper right of this picture you can see the wheel and directly to the left of the wheel is the 'back' button.
The next pictures will show why the button doesn't 'click' anymore


The first photo shows the accumulated lint that sometimes hinder the correct functionality of the wheel.
The second one show that the little 'clicker disk' has a crack in it.
The last one shows the crack in detail.
Next you need to find another 'clicker' button. Those can be found on any old phone that has buttons on the side of the phone. The dial pad number buttons are too big to use. It should be easy enough to find an old phone that can be used for parts nowadays.
The next pictures are of the button you should be looking for.


Now that you found the replacement, let take out the old one.
The best tools I found to use are a tiny jewelers flat screwdriver and a pair of long nose needle nose pliers.
Pictures always help
Locate the 'orange' area. This is a plastic cover for the button. Use the screwdriver to carefully pry up a section of the 'orange' plastic, just enough to grab it with the pliers. Pull it out with a slight upward motion.
The goal is to grab the plastic and the 'clicker' button will stick to it and it will all come out as one piece.

Here are the two 'clickers' side by side
The next thing to do is to put the new 'clicker' back into the wheel housing, then put the plastic on top of it. Give it a couple of clicks to seat it into it's spot and then reassemble the phone.
Now you will have your wheel clicker back and you can work on that high score in BrickBreaker.
Blackberry 'Back' Button Fix
The 'Back' button is fixed in the same way as the scroll wheel button. The only difference is the actual 'clicker' that goes in there.
Here is a picture of the 'Back' button.
You need to take a razor blade and trim back that black 'melted' plastic that holds the cover on.
After you get it trimmed back. then use the razor blade to pry off the cover. Try not to bend the cover because you need to use it again.
On the inside you can see the square 'clicker'. Take it out and replace it with the new one.
These buttons are harder to find. You either need to use another blackberry for parts or any Push-To-Talk button.
The hard part of this repair is getting the white plastic to balance straight up.
Notice the two metal tabs that stick up, you use those tabs to hold the metal cover back in.
Just bent them down a little so the hold the cover. Don't bend them too hard because the button will not work.
Pictures of the tabs to bend.
Once you get the tabs bent in place you can reassemble the phone.
Save some money, fix your own blackberrys!!!
Monday, August 27, 2007
Blackberry Scroll Wheel 'Clicker' and 'Back' Button Fix
Wednesday, April 25, 2007
DIY Wireless Network Printer

With everything going wireless, it's a logical choice to have a wireless printer. They can range from a couple hundred dollars to a couple thousand, depending on what kind of printer you choose.
But you don't want to invest in a new printer when the one you have works perfectly. Well I found a solution! And it is very inexpensive!
The key to this setup was the router. Fonera makes a very small wireless B/G router which makes it easy to install anywhere. You can find them on ebay for less then $20
The original firmware would not do for my project so I installed DD-WRT. and I would like to thank all those who answered my questions and helped me at www.dd-wrt.com
So now I will show you the construction on my wireless network printer adapter.
Step 1
Gather all the parts together
You will need a printer, a network adapter for the printer, a wireless router, wire, LEDs, solder, and plenty of time.
Printer: I think any printer will work, as long as there is room inside it to fit the router. I was given the LaserJet 5 and found out that it had network capabilities. I searched Ebay and found a network card, untested, for $7. A most definite BARGAIN! For all those with printers that attach with usb, they make usb-to-network adapters, I believe they will work too.
Router: I chose the FONERA wireless router based on three things: 1) it's size, 2) customization with DD-WRT, and 3) the Price. I was able to pick up a couple of these for free.
Router Software: DD-WRT is software that is installed inside the router and opens up the potential that many routers contain.
NOTE: As far as the exact setup for your router and printer, you will find the most help in the forums. At the end of this post, I will put screen shots of my current setup. Hopefully that will help.
Misc Parts: I used many different parts from various computer/electrical components. All of the parts have been laying throughout the house collecting dust. I don't have a parts list, so just follow the basic layout and you can find out what works best for you.
Step 2
Find space for your router
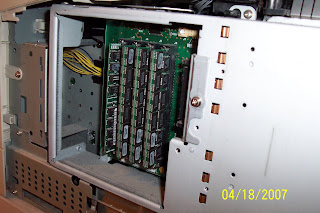
There are two was to locate some extra room inside your printer. One way is to just take it apart. You're going to be taking it apart anyway so why not start there. Unless, of coarse, you still need a functional printer at this time. And the second way to find some open space is to use Google. There are many sites that carry "service manuals" for your printer. A "service manual" is the manual that the repair technicians use to fix the printers. it gives detailed instructions that go beyond printing-a-test-page. For example: we will be covering how to power the router later and the "service manual" will give information on the power supply and the wires inside the printer.
I found a perfect spot to mount my router. It is located towards the front of the printer, and has plenty of space.
Step 3:
Make your mounting bracket
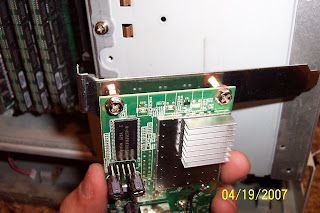
The simplest bracket mounting system I found was to use one of those computer expansion port covers. It's the piece of metal that most people remove from their computer when they add a video card, network card, sound card or other pci/agp card into their computer. Just drill 2 holes and add some spacers (I used motherboard stand-offs) The result has a nice clean look.
Cut a little slot in the metal and slide your bracket in. Then mark the cutout area.
Next I used a blank CD to make another mounting for the quick connect and the antenna connection. (blurry, sorry)To bend the plastic, just heat it up with a hot air gun or blow torch. Then drill the hole for the antenna connector.
Step 4:
Wire the adapter
This is the part where you can use whatever you have.
I pulled a jumper block off an old parallel/serial pc card and used that as a quick connection block. Using my dremel, I carefully drilled a series of holes in the CD bracket and soldered the jumper block to it.
I need 2 connection for each LED: Power, LAN (cat5), and WLAN (wireless). and 4 connection for the reset switch. I intended also to have the antenna connected also but decided on a different method for that.
The goal here is to have access to the lights and reset switch when the router is installed in the printer.
Wiring for the LEDsWiring for the reset switch
All wired
Step 5:
Find some power
The Fonera runs off 5v and according the the Laserjet 5 service manual it also produces a 5v source. Now I'm not an electrician, but using my multimeter, I was comfortable using the power from the printer.
Blue wire: Ground, Brown wire: 5v, Red wire: 24v.
Remove the needed wires from the connector so you can solder to them
(no picture: The wire I used was pulled off the computers internal speaker. One end soldered directly to the power supply wires and the other end has the the connector for the block pictured below)
Another custom jumper block soldered to the router.
Step 6:
Some Assembly required
At this point you should have your router mountable and wired up. Now comes the fun part.
Adding lights. Standard LEDs will work fine.
Here's a little tip: To get the "Glowing" effect, just use some fine sand paper and lightly sand the LEDs
finding a location to mount the lights and switch, and still trying to make it look nice, might be a challenge. So find a spot that looks good and can be accessed easily.
Once you find a spot, dill the holes and mount them
a little hot glue to hold it in
a little more wiring
cleaned up
a little pre-Assembly testing
Step 7:
Final Assembly and testing
In this picture you can see the router mounted in place. Also you can see the antenna installed and the connector that leads to the lights and the reset switch.
one note about the antenna:
I wanted to mount the antenna on the outside of the printer to get a better signal (i get a decent signal now) but I did not have a long enough cable. I had 2 failed attempts at making my own cable, not only that, but i got worse signal then with no antenna connected at all. So if you have a long antenna cable then it is recommended to mount it on the outside of the printer.
Before:
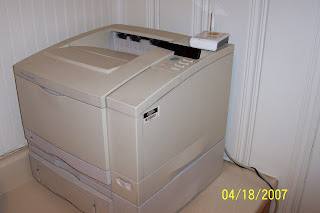
After:
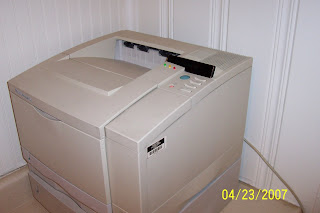
Before:
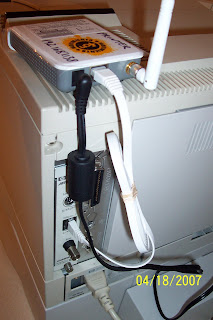
After:
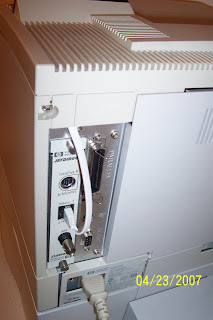
Final Thoughts:
After you have completed this project, you will have a less clustered mess of wires. Also, using DD-WRT, you have the option of making your printer a Hot-Spot for your wireless network.
DD-WRT on the Fonera is still in its infancy, so there are a lot of options that have yet to be perfected.
My Wireless Setup:
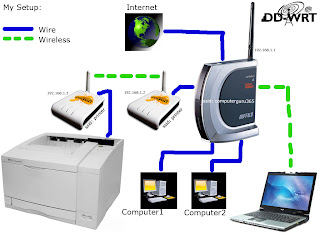
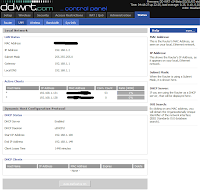
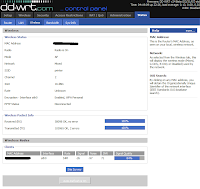
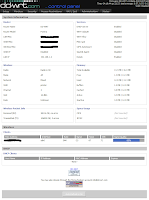
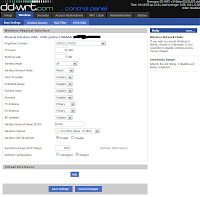
The following screen shots are of my current dd-wrt settings.
192.168.1.2 (fonera plugged into the Buffalo)
administration-management
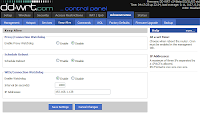
administration-keep.alive
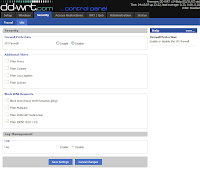
security-firewall
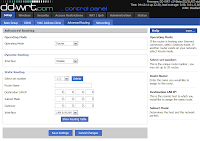
setup-advanced.routing
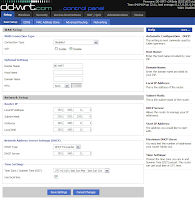
setup-basic.setup
status-lan
status-wireless
sys-info
wireless-basic.settings
wireless-wireless.security

---------------------------------------------------------
192.168.1.3 (fonera plugged into the printer)
administration-management
security-firewall

setup-advanced.routing

setup-basic.setup

status-lan

status-wireless

sys-info

wireless-basic.settings

wireless-wireless.security

If you have any questions or need something explained in more detail, just let me know
As Always, Have Fun


